If you purchased networking equipment from Scopos with your Athena Order, this is already pre-configured upon provisioning your range before it leaves our warehouses. These steps are only needed if reprovisioning your equipment. Please contact us if you have any questions.
This resource is intended for those need to reconfigure their Unifi Access Point for use with their Athena Range. This article assumes the user has been locked out of the Access Point and the device needs to be reset and configured.
Note: Power to the Access Point should never be removed or disrupted during this reset. Leave your device on.
1.Reset your Access Point (AP) to factory defaults by holding the reset pin on the back (near the Ethernet port) for 10 seconds.
2.Download and Install the UniFi Network Mobile app from your respective app market.
3.Open the UniFi Network Mobile app and tap + in the top-right corner to initiate device discovery.
4.Click Connect to a device manually, then Connect to AP.
5.Scan the QR code on the back of your AP and complete the connection process.
6.Click Join to allow UniFi Network to connect to your access point. This will allow you to manage the AP. You may be instructed to configure your device via the Quick Setup. Feel free to do so, however, we will be changing some of this information a few steps further.
7.Now that you are connected to the device, select Configure from the top-right
a.Device Name: Name your device, such as AP1.
b.Radios: Leave these at the default values unless instructed otherwise.
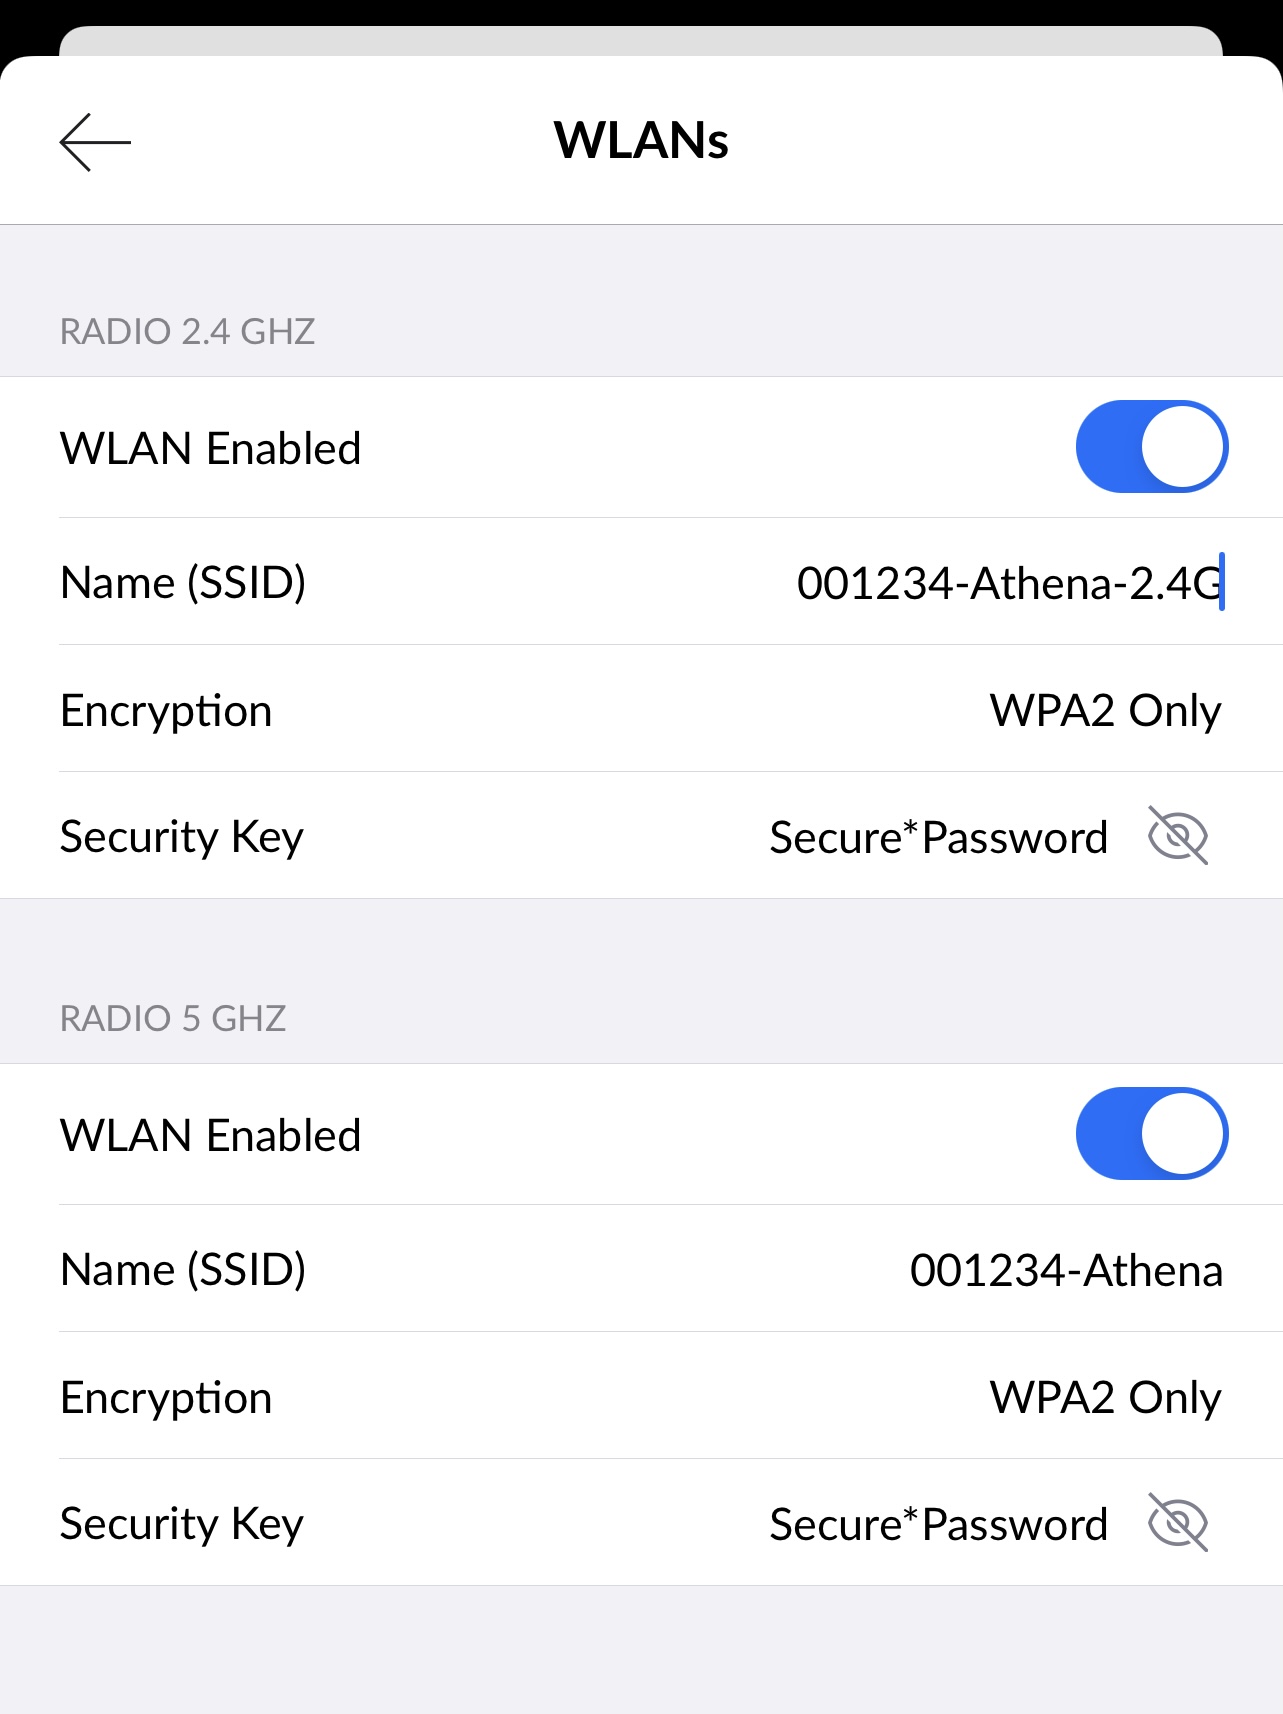
c.WLANs: Your WLANs should look similar to the example below, substituting the account number for your own and providing a secure password/security key.
i. 
d.Device Credentials: Keep this information safe, you will need it to alter the configurations. If you lose this password, you will need to reset your AP to factory settings and start this configuration process over again.
8.Once your settings are correct, select Save from the top-right. The configuration is now being sent to the AP.
9.Wait up to 5 minutes for the network to be available and broadcast.
For more information on how to configure your Unifi Access Point using Standalone Mode, please visit https://help.ui.com/hc/en-us/articles/360012622613-UniFi-Network-Add-new-devices